Follow :

Tuesday, 31 January 2012

Parsnip & Chestnut Soup (Another winter warmer)

Image courtesy of mistress-of-spices.com


I made this some years back during the winter, thinking along the lines of something to complement parsnips and the mid range in flavour tones they have, which is not to dissimilar from vanilla. I had thought along the lines of honey or similar, but then it hit me - a can of chestnut puree eyed me suspiciously from the shelf and thus this hearty winter warmer was born.

It is a very filling, sweet and comforting soup. If you are a fan of parsnips and generally sweet vegetables this will be right up your alley. Posted at the request of Jaffacake - this recipe hits all the buttons for the budding soupmaker. It works on a number of levels and can be applicable to alot of vegetables such as carrot, sweet potato, butternut squash and even turnip or mooli radish.

Feel free to play around with the recipe a little - use of mellow spices such as turmeric and cumin can make this dish even more pleasurable.

You will need (makes a large batch of about 4-6 portions)

3 or 4 parsnips, cleaned and peeled into ribbons. Chopping them up works but will take alot longer.
Can of chestnut puree
500ml milk
250ml vegetable or chicken stock.
1 large onion diced finely.
Teaspoon of butter or margarine

Heat up a large pan, add the finely diced onion and the butter. Cover the pan and allow the onions to sweat and soften, then add the parsnips. Allow the parsnips to colour slightly then turn the heat down to low and cover the pan until the parsnips begin to break up. Add the milk and allow to come up to temperature, but not boil, When the parsnips have turned to a mash texture, add the chestnut puree then blend to a uniform texture.

Add the stock, bring to the boil then simmer for approx 20 minutes. Taste and season appropriately

Serve while piping hot, and add a spoonful of honey if feeling adventurous.

Thursday, 26 January 2012

Classic Italian Tomato Sauce


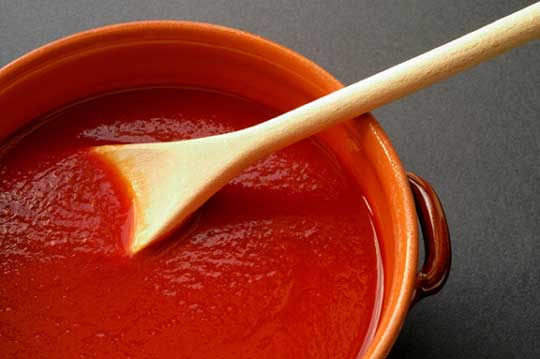
image courtesy of www.grow-tomato-sauce.com

Surprisingly enough i hadnt gotten around to adding a tomato sauce recipe until now. How i had overlooked such a rudimentary sauce for my online food arsenal is beyond me - but fear not. Here it is.

Tomato sauce is one of those base sauces that has a number of applications from everything to pasta to parmesan and everything in between. You can also use it as a combination ingredients for other things too.

You will need:

3 cloves garlic (finely chopped)
1 Onion, Diced to same proportions as the garlic
2 tbsp olive oil
2 cans chopped Tomatoes or passata (passata will perform better and cook in less time)
glass red wine
1/2 tsp sea salt.
Handful Fresh Basil, Finely Chopped, If dried 1 Tbsp,
Handful Fresh Oregano, Finely Chopped, If dried 1 Tbsp,
2 Tbsp Tomato Puree,

The doing bit

In a pan heat up the olive oil and add the onions and cover the pan until the onions soften. Add the garlic and red wine and allow to cook for about 2 minutes.

Add the salt and allow liquid to reduce to a syrup consistency.

Add the tomatoes and herbs, bring the mixture to a boil then reduce heat to a simmer for about 5 minutes, Once mixture has simmered add tomato puree and stir in. Simmer for a further 5 mins then remove from heat.

Serve as necessary or cool and store.

Sauce Au Poivre (Peppercorn sauce)

Image courtesy of bigoven.com

I love peppercorn sauce - it goes well with alot of things and its meaty flavour helps accentuate most meats from chicken to veal and everything inbetween. Its a popular steak sauce and simple and quick to make, so i've included it here for those of you wishing to make it for your own culinary curiosity,

You will need:


2 knobs of butter
Finely chopped shallot
Half a handful of parsley finely chopped
Roughly ground black pepper and a 8-10 of peppercorns
Shot of brandy
Ladle of beef , lamb, chicken, or veal stock
Salt
2 tbsp. double cream

In a pan melt the butter and add the shallot. Cover the pan and allow to sweat on a moderate heat (but dont let the butter burn). When the shallot has softened add the peppercorns, and ground pepper. Cook for 3-4 mins still covered, then add the brandy. Flame until alcohol has burned off, then add the stock. Reduce by a third and taste. If more punch is required reduce until half of liquid has gone, then add the cream and parsley. Cook for a further minute then serve.

Saturday, 21 January 2012

Broccoli & Stilton Soup

image courtesy of lovefoodhatewaste.com

A classic soup - this combines helathy broccoli with tasty Stilton in order to crate a hearty and welcome soup. Back in the day i used to make this virtually daily, and as such this recipe employs a few tips and tricks to bring out the flavour of this wonderful soup to new heights. You wont be disappointed.

 Posted here at the request of Josh Brown, may he long enjoy this recipe :)

You will need (makes about 4-6 portions)

1 pint bechamel sauce
250ml vegetable or chicken stock
100ml white wine or dry cider
1 head of brocolli (chopped into roughly 1cm pieces - stalk included)
100g stilton
tbsp butter

The doing bit

In a large saucepan, add the butter and heat until bubbling. add the chopped broccoli and cover the pan and allow the broccoli to sweat until it begins to soften. Add the stock, bring to the boil then simmer.When the broccoli is completely soft, blend.

In a separate pan add the wine and stilton and heat gently until the cheese melts into the wine and forms a uniform paste.Heat the bechamel separately and add the cheese mix to the bechamel.

Combine cheese / bechamel mix with the broccoli blend. Cook at a simmer for a further five minutes and season if necessary.

Serve piping hot.

Tuesday, 17 January 2012

Beetroot Soup (A winter warmer)


Ordinarily I wouldn't go out of my way to buy beetroot. Don't get me wrong its a wonderfully useful vegetable, full of nutrients etc - it just often slips my mind. That said its quite low in calorie and generally good for you.

The shopping trip last night yielded some beetroot from the reduced section at a price that couldn't be refused, and as a result i decided to reunite with an old love - beetroot soup. Its extremely colourful, quite filling and very warming. And for the most part its healthy too!

You will need:

4 fresh beetroot (smallish) peeled and chopped into 1cm pieces
Pinch nutmeg
Tbsp butter
1 white onion (large) chopped to the same proportions
250ml whole milk
2 cloves
1 litre vegetable or chicken stock.
(optional) handful of fresh coriander chopped

The doing bit:

In a pan add the milk, cloves and a pinch of nutmeg. Warm the milk through and allow to infuse but do not let it boil.

Put the butter into a pan and heat until melted and bubbling. Add the onion and beetroot - put the lid on the pan and allow to "sweat" until the onions become soft. Add the milk infusion and the stock. Bring to the boil then simmer until the beetroot pieces become soft. Add any optional herbs & blend, then season if necessary with salt and pepper.

Serve piping hot, with an optional dollop of cinnamon creme fraiche.

Sunday, 15 January 2012

Yasai Yakitori (grilled japanese skewers with yakitori sauce)


In true tradition of most yakitori dishes, these yasai (vegetables) are in keeping with the tradition. They form a colourful and flavoursome side dise, and can fit in almost any setting, being as a starter, accompaniment to a main course, or a delightful finger food on buffets. They're also extremely easy to make. Did i happen to mention they're healthy also?

You will need:

1 courgette, cut into 1 inch pieces
3 thick spring onions, bulb only, cut in 1 inch chunks (sliced diagonally for aestheics)
1 orange or yellow pepper, trimmed, deseeded, and cut into 1 in chunks
6 button mushrooms
6 cherry tomatoes
Vegetable oil
salt and white pepper
2 tbsp yakitori sauce
6 bamboo skewers, soaked in water for about 2 hours

Thread 1 of each piece of vegetable on each skewer, the order doesn't matter so much, but for aesthetics and uniformity, remember your original configuration. Brush with vegetable oil and season with salt and white pepper.

Heat a heavy bottomed frying pan or griddle until smoking, then add the skewers turning frequently for 4-5 until golden brown.

Drain on kitchen paper to remove excess oil. Brush with yakitori sauce and serve.

Devour.

Sunday, 8 January 2012

Yakitori sauce

Yakitori is a slightly sweet, soy based sauce that is used for dipping or glazing meat, vegetables and fish. It's also very moreish :)

You will need

6 tablespoons of sake
180ml light soy sauce
6 tablespoons mirin
1 tablespoon caster sugar

The doing bit

Combine all the ingredients in a small pan and gently heat to dissolve sugar . Set aside to cool.

Ebi kuzu kiri sauce

This sauce is sharp and intense, and will serve well as a dipping sauce or as a finish aid. It uses clean citrus flavours balanced with rich oyster sauce. Ideal for use with seafood, fish, red meats and poultry.

You will need

2 teaspoons sugar
1 tablespoon oyster sauce
Juice of 3 lines
2 tablespoons Thai fish sauce

The doing bit

Gently heat the sugar and fish sauce until the sugar dissolves. Allow to cool and combine with the oyster sauce and lime juice.

Friday, 6 January 2012

Cured Marinated Salmon Salad

image courtesy of marel.com


What I love about salads is they can be, in the right setting wonderfully satisfying and fulfilling. Although light and more often than not guilt free, they can be incredibly wholesome. This recipe is no exception to the rule, it provides clean and earthy flavours to create a wholesome balance, whilst at the same time giving a nice healthy balance to nutrition also. Using traditional oriental flavours, as well as fish that is rich in protein, vitamins and omega 3 oils, it provides a joy for all audiences. It can also be adapted for larger proportions should the need arise, without the guilt factor.

You will need (for the marinade)


1 teaspoon sugar
Zest and juice of one whole lime
1 garlic clove, crushed with a little salt
1 teaspoon sesame oil
3 tbsp light soy sauce

For the salad

2 pieces (roughly 75g) fresh salmon cut into thin slices (use trimmings for thrift)
150g beansprouts
75g cucumber, grated
1 red chilli, trimmed and very thinly sliced
3 sprigs flat leaf parsley, finely chopped.

The doing bit

Marinade:

Combine sugar and two tablespoons on the lime juice in a small bowl and stir until sugar has dissolved. Add garlic, sesame oil and soy sauce and stir until uniform. Take the salmon and marinade in 4 tablespoons of the marinade mixture, cover and allow to marinade for about 3 hours. Store the rest of the marinade for later use.

The rest:

Blanche the beansprouts in lightly salted boiling water for 10 second and refresh under cold water. Combine with the cucumber and chilli. Sprinkle with the remaining juice and flat leaf parsley. Serve the salmon slices on top or around the salad (its all down to preference). Garnish with a teaspoon of the remaining marinade and serve.

Wednesday, 4 January 2012

Chicken Gyoza

image courtesy of closetcooking.com

Another wonderful application for the glorious gyoza, chicken gyoza provides a wonderful snack for those who prefer white meats to seafood. As before they sit well in every setting, and are hearty enough to provide fulfillment in this filling snack.

You will need: (makes about 15)

50g chinese leaf
75g white cabbage
50g canned water chestnuts, drained
125g boneless, skinless chicken thigh meat, minced (can be food processed thigh meat)
15 g chives, finely chopped
25 g cornflour
1/2 teaspoon sesame oil
1/2 teaspoon light soy sauce
1/2 teaspoon caster sugar
pinch of salt & white pepper
15 gyoza wrappers
gyoza sauce (to serve)

put the chinese leaf, white cabbage and water chestnuts in a food processor and pulse until chopped. Using a tea towel, squeeze the mixture to remove excess moisture then combine in a bowl with the chicken, chives, cornflour, sesame oil, oyster sauce, soy sauce, sugar, salt and pepper.

Place a teaspoon of the mixture in each gyoza wrapper, moisten the edge with a little water and seal the edge by folding over the gyoza skin. Repeat as necessary.


Put a teaspoon of the mixture into the centre of each gyoza wrapper. Moisten the edge of each wrapper then fold over and press the edges. You can crimp the edges if you wish, but this is optional.

Sear the gyoza in a pan in a small amount of vegetable oil until starting to brown, then sear the other side, but be sure not to crowd the pan. no more than 4 or 5 at a time. Take the pan off the heat, add a few tablespoons of water to the pan and cover immediately. Return to the heat for one more minute then allow to rest for about 2 minutes.

Serve with gyoza sauce, sweet chilli, or another sauce of your choice.

Gyoza Sauce

Gyoza sauce provides a very useful and verstaile flavour base, that can be used not just for gyoza but in a variety of dishes. Although best served with gyoza or as a glaze or dipping sauce for meat, it goes phenomenally well with earthy vegetables also such as radishes etc - so we can see that the application for this sauce becomes diverse. With attitude and punch, its bound to go down a storm.

You will need (makes about 350ml)

1 large garlic clove, peeled and chopped finely
1 large red chilli (chopped to same proportions as the garlic)
Salt
25g sugar
100ml malt vinegar
250ml light soy sauce
1 tablespoon sesame oil

Crush the garlic and chilli together with the flat of a chefs knife, to form a paste. Heat up the vinegar and dissolve the sugar within over a low heat. Combine and store.

Will keep for several weeks chilled.

Tuesday, 3 January 2012

Ebi Gyoza (Prawn, sesame and soy sauce dumplings)

Image courtesy of closetcooking.com

Ebi gyoza are a fantastic party treat, and as with all gyoza they sit well with almost every setting. This recipe combines the use of earthy flavours such as soy and spinach, and overtones them with prawns to create a rather unique but loveable combination.

You will need: (makes about 15)

75g cooked and peeled prawns
70g canned water chestnuts, drained
1 spring onion trimmed
60g baby spinach leaves
5g cornflour
pinch of salt, sugar and white pepper
1/2 teaspoon oyster sauce
1/2 teaspoon sesame oil
15 gyoza wrappers

The doing bit

Combine prawns, water chestnuts and spring onions in a food processor and blitz to a uniform paste.
Wilt the spinach in boiling water, and be sure to drain well and squeeze out any excess moisture. Finely chop the spinach and mix into the prawn mixture along with all the dry ingredients, the sesame oil and oyster sauce. Mix well until a uniform paste is reached.

Put a teaspoon of the mixture into the centre of each gyoza wrapper. Moisten the edge of each wrapper then fold over and press the edges. You can crimp the edges if you wish, but this is optional.

Sear the gyoza in a pan in a small amount of vegetable oil until starting to brown, then sear the other side, but be sure not to crowd the pan. no more than 4 or 5 at a time. Take the pan off the heat, add a few tablespoons of water to the pan and cover immediately. Return to the heat for one more minute then allow to rest for about 2 minutes.

Serve with gyoza sauce, sweet chilli, or another sauce of your choice.

Monday, 2 January 2012

Gyoza (Cases)

Image courtesy of closetcooking.com

Gyoza are a wonderful side dish and are technically a type of dumpling. They can be pan fried or steamed and can have almost any filling. Usually served as a type of Japanese fast food, I first came across gyoza in the wagamama cookbook(which i'm currently working my way through, and continues to fascinate me). Although a favourite in Japan, gyoza are much like alot of Japanese fast food - which they have inherited from the Chinese styles of cooking. Regardless of their origin, they are a wonderful dish that are acceptable in many settings, including parties, functions and as an informal food for social occasions.

The focus in those recipes is to use prebought gyoza cases - this can be a major time saving factor, however if my research is anything to go by, gyoza are much better when home made. the comparison is made very much to manufactured vs. home made pasta - having a smooth and less papery texture.

This recipe is in volumed proportions (cups) so you can make as much or as little gyoza as you like. Bear in mind that using a standard "cup" measurement though this recipe will make about 40 gyoza cases. They can be chilled or frozen if stored correctly for later use, so consider it an investment to your larder.

Ingredients:

2 Cups of all purpose flour (strong bread flour will give a more doughy gyoza)
1/2 cup of boiling water
1/4 teaspoon salt

The doing bit:

Sift the flour into a mixing bowl with the salt and stir with chopsticks until well mixed. Add the water and stir together the dough until all the flour is mixed and forms a dough. When a uniform dough cover the mix with a damp cloth and leave to rest for about 45 mins to an hour.

Pull out dough and knead until a smooth consistency, then roll into a sausage / cylinder shape in cling film. At this point I usually use a greased sterile plastic pipe to form it and then pull out the dough.

using a sharp knife cut into 40 slices, then roll out each slice to a desired thickness, and use a 3 in pastry cutter to form the gyoza shape. Repeat as necessary.

Wrap the gyoza cases in cling film and store or freeze.

Use as necessary.